Matt Keenon produced g-code to make his own Maple CNC milled propellers based on airfoils he and his collegues produced just for the purpose of microflight. Matt's little masterpieces can be seen on the front of many of his models. Matt was kind enough to lend out his code to others to use and that is how I got hold of it.
The origional code is in two parts, one mills the top surface and one the bottom. I only wanted the top surface and so extracted from the x,y,z coordinates. This set of points could then be used within Rhino3D to produce a model. The hub that Matt normally hand carves could also be added to the model so it could be milled in one. When Matt found out about the project he produced some special code for me with a flatter airfoil and no cutter compensation making the drafting process easier and also the prop more suitable to single surface carbon. Thanks Matt!!
Here is the result of the simulated cutting of the propeller mould in MasterCAM:

This simulation uses a 1.5mm ball ended cutter and the prop is 4" in diameter. This form was then milled in Delrin to produce a single sided plug complete with draft angle on the sides and a hole in the middle :-)
This can be used "as is" by using a heatshrink or cling film top half to the mould and indeed the plug has been shipped off to Gordon Johnson for just such treatment. It was he that got this project started with a request for a CNC'd mould at a different size to the origional.
I however, wanted to copy another Gordon, this time Gordon Brown, the Aeronutz master of props. GB uses two part moulds made from body filler and based on available props and parts/combinations of these.
I don't like body filler and I just happend accross Devcon high temp mouldmaker resin in the Cromwell Tools catalogue. Not cheap but a pot at about 25 quid has 700g. Half this mould took about 112g and I used too much. The stuff is also very hard, tough, heat proof (can be used for injection moulds) and it turned out user friendly and best of all fairly odour free.
The method was as such:
1. Make a small wooden box (balsa and cyno)
2. Place plug in bottom (taped to the bottom for security)
3. Mix up epoxy (instructions say mix it all but the weight ratio is 1:112 so I made up 112g.)
4. Preheat mould at 50degrees (instructions say for 3hours, don't think so, 5min)
5. Brush on some of the epoxy onto the plug. This is to prevent bubbles and it did! The preheated plug means the epoxy flows nicely for good coverage as well.
6. Pour in rest of epoxy
7. Bake at 50 degrees, took about 30min to harden for me.
8. Remove central pin (drill blank) with a twist and a pull from pliers (this was waxed!)
9. Split mould, that was quite easy. Delrin rules!
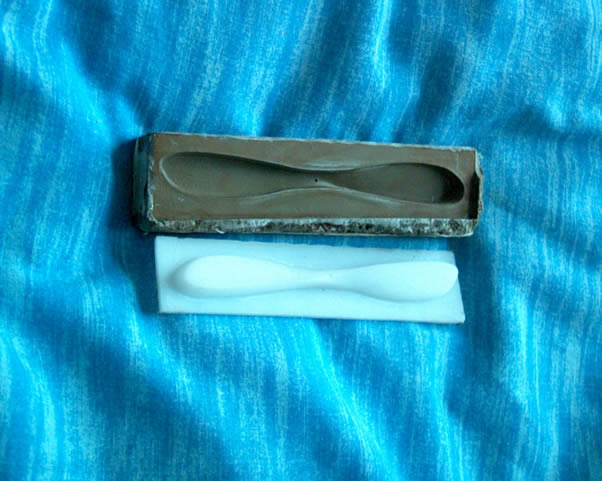
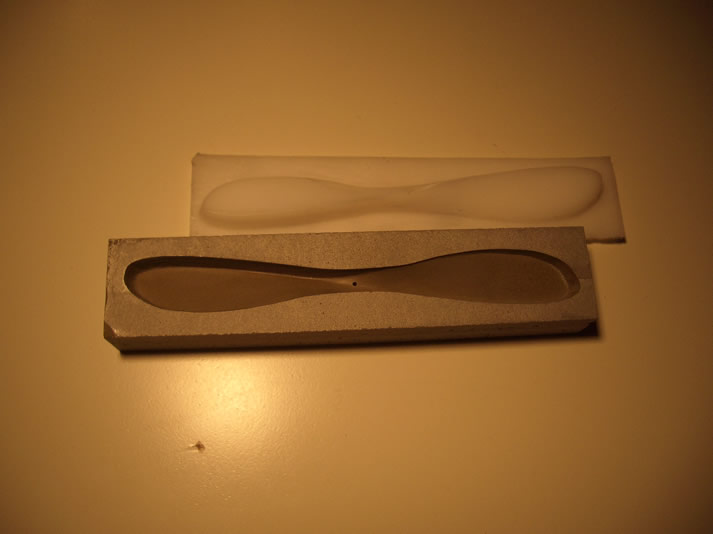
Here is the Derin plug (white) and the female mould cast from it. Delrin is fairly non-stick and needed only a mild smear of wax to make things easier.
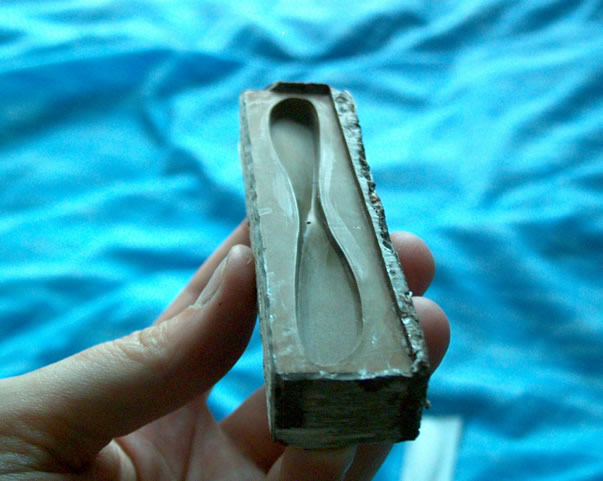
And here is a closeup of the mould, really nice and dead hard!
Next step is to clean up the faces on the mill, add ident marks in the flat faces and holes for alignment dowels. Then sides will be put on this mould and it will be treated with PVA release before pouring in the second half.
NEW:
I did this stuff soon after these pictures were taken but it takes me a while to get around the the website:
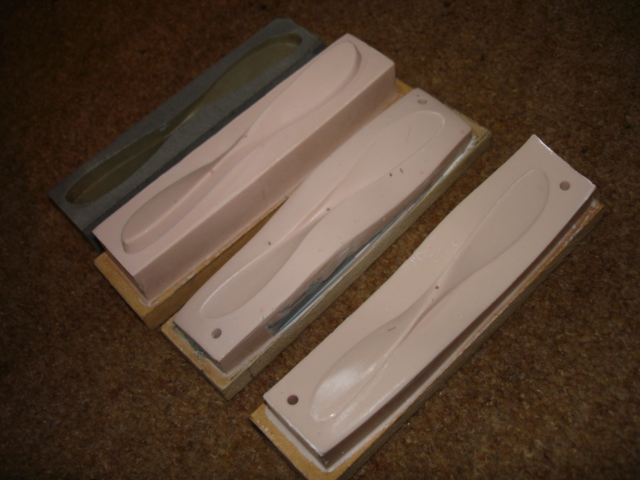
This picture shows the mould after machining the outside square on the milling machine. This epoxy cuts very well, probably due to the aluminium content.
I also cleaned up the other face so it looks neat. You can see a very fine crack on the edge but I think this is actually just a line of bubbles. You paint the epoxy on to the warmed former before doing the final pour to prevent this but there are limits and it is quite a sharp edge.
Here is the cleaned up female next to the milled male.
Newsflash, Gordon Brown to the rescue:
After the moulding of the plug I found it had become warped lengthways. This may be in part due to the heat involved or just the product of machining. Gordon Brown saw the female however and decided he could not resist making a mould from it.
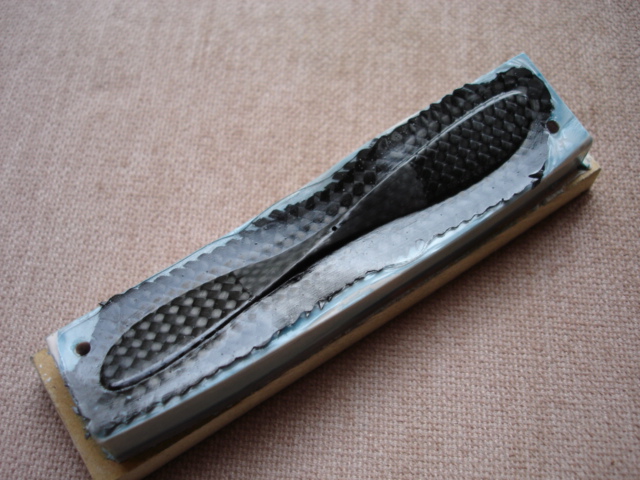
Here is the start of the process: my mould is at the back, from this a cast was made with car body filler. From this positive plug a negative was made and this was then modified so that the slopes up to perimeter of the blade is reduced in height. Then from this another positive is made that reflects these changes:
Remember that my origional plug was designed for Gordon Johnson to use his heatshrink method on; the steep sides define the edge of the blade well and allow a tight pull from the heatshrink, with Gordon Brown's two part mould, room needed to be left for the carbon that lies beyond the prop surfaces. Gordon has carefully left a small area around the perimeter of the positive for this. It also gives somewhere for excess epoxy to go rather than out of the sides of the mould (most messy). You will also notice a large hole in the middle of the prop, this allows for a moulded hub piece. Finally the corner holes are for dowels as mould alignment is hard when there is wet carbon everywhere.

The propeller after moulding, Gordon has used some carbon tows in the middle of the prop for extra strength. This then needs to be trimmed, this can be the hardest part, ideally another jig would be set up on the CNC for trimming or at least another plug with vertical sides could be made, this could be used as an aid in trimming.
The prop has been trimmed now and also tested out on a model of Dave Cholerton's using a Falcon PU03, although not a conclusive test the model flew better than it had done before using several other propellers.
Now all I need to do is fire up the mill for another plug for Gordon Johnson!